
Using a dog grooming table correctly isn’t just about convenience — it’s about keeping your dog safe, calm, and comfortable while you groom at home or in a professional setting. Every year, thousands of dogs suffer avoidable injuries from slipping off tables, getting tangled in restraints, or panicking and jumping.
In this guide, we'll explain how to safely secure a dog on a grooming table and what features to look for in a professional grooming table.
A dog grooming table is more than just a raised platform. It helps groomers maintain better control of the pet while improving safety for both the animal and the handler.
Properly securing the dog provides several benefits:
Prevents the dog from jumping or falling
Keeps the dog steady during clipping, trimming, or bathing
Reduces the risk of accidental cuts
Protects groomers from back strain
Creates a calmer grooming environment
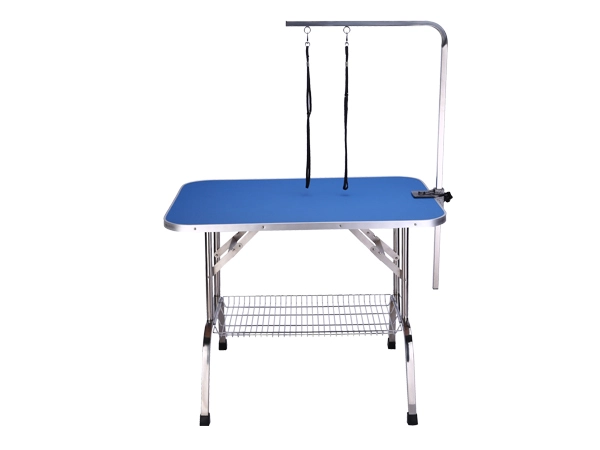
Professional grooming salons always use a dog grooming table with adjustable grooming arms and nooses because it ensures better control during grooming sessions.
Step 1: Choose a Stable, Safe Dog Grooming Table
Safety starts with the table itself. Look for these must-have features:
Rock-solid base that eliminates wobbling or tipping
Adjustable height (ideally electric or hydraulic) so you can work at elbow level without bending
Non-slip surface or removable top for easy cleaning
Strong grooming arm with secure clamp
Quick-release hardware on all restraints
Our Hydraulic Pet Grooming Table checks every box:
Unique “Z” shape design eliminates wobbling and tipping at any height
Smooth hydraulic lift from 51.5 cm to 101 cm (20¼” – 40”)
Heavy-duty metal frame with pliable PVC edging
Removable top that’s easy to sanitize
Built for professional and home use
Step 2: Prepare Your Dog and the Environment (5–10 Minutes)
Let your dog sniff and explore the dog grooming table on the floor first.
Use high-value treats and calm praise to create positive associations.
Start with 30-second sessions of standing on the table (unsecured) before adding any restraints.
Choose a quiet, well-lit area with no distractions.
Anxious dogs (Chihuahuas, rescues, or puppies) may need 3–5 short practice sessions before the first full groom.
Step 3: Set Up the Grooming Arm and Table Height
Lower the table completely before placing your dog.
Attach the grooming arm firmly to the table edge (tighten clamp until it doesn’t move).
Adjust table height so your elbows are at 90° when grooming — this protects your back.
Position the arm so the noose will sit naturally above the dog’s neck when standing comfortably.
Step 4: Secure the Dog — Step-by-Step (The Safe Way)
Never put the noose on first and then lift the dog. Always follow this order:
1. Place the dog on the table
Lift or guide your dog into the center. Keep one hand on the collar or harness until secured.
2. Attach the quick-release grooming noose (neck loop)
Slide the loop over the head and position it high on the neck (behind the ears, like a collar).
Leave two fingers of space between the noose and throat — this is the golden rule for safety.
Clip the quick-release to the grooming arm.
The dog should stand naturally with head level, not pulled up or hanging.
3. Add a waist/belly strap (recommended for medium-large or wiggly dogs)
Place a padded belly band behind the front legs or around the waist.
Clip to the arm or lower ring.
It should support without lifting the belly off the table.
4. Final Safety Checklist (do this every single time):
Noose has two-finger slack
Dog stands in natural posture (all four paws flat)
Grooming arm is rock-solid
Table doesn’t wobble when gently pushed
You can reach the quick-release instantly
Dog is calm and breathing normally
Small dogs & cats: Use lighter rope-style nooses or Trach Saver-style leg loops (avoid neck pressure).
Large breeds: Double-check weight rating (our table handles heavy dogs easily).
Puppies & seniors: Shorter sessions + extra padding.
Nervous or reactive dogs: Start with just the table and arm (no noose) for several days.
Tightening the noose like a choke collar
Using the table as a “playpen” and walking away
Skipping the two-finger rule
Buying cheap tables with wobbly arms
Forcing a scared dog without desensitization
How tight should the grooming noose be?
Two fingers should slide easily underneath. Any tighter and it restricts breathing.
Is it safe to leave a dog on a grooming table alone?
Absolutely not — even for 10 seconds. Falls and strangulation risks are real.
Can I use a grooming table for a puppy?
Yes, but start with very short, positive sessions and never use a noose until the puppy is comfortable standing on the table.
What if my dog tries to jump off?
Reduce slack in the noose slightly and stay within arm’s reach. Most dogs stop trying after 2–3 calm sessions.
Do I need a belly strap?
Helpful for medium+ dogs or dogs that sit/turn, but not mandatory for calm small breeds.


